There are times when I find it desirable to machine a piece without using holding tabs to keep all the parts in place. I started doing this 5 years ago and over time have refined the technique and defined the rules that I observe when doing this.
The Rules!
- You must use a 1/8 or 3mm down cutting spiral router bit.
- Do not use this techniue on material thinner than 1/2" or 12mm.
- Use only on wood.
- If available use a dust shoe. If you find that the vacuum is pulling too much chipout of the slots then turn the vacuum off but leave the dust shoe in place.
- Do not do this on anything you cannot afford to remake should it suffer damage.
- If things are not cutting as expected then stop and sort it out before continuing.
- This is not a standard machining technique so use at your own risk.
I have found that following these simple rules have worked well for me over the years.
Where did I get the cutters for this project?
The cutter I used were purchased from this supplier on Ebay
http://ebay.to/2xienoR
Other ebay suppliers of 1/8" down cutting bits.
http://ebay.to/2zfwxYY
They are 1/8" in diameter single flute down cutting spiral bits.
The
length of the cutting edger is 10mm ( 3/8") but anything similar eg
12mm(1/2") cutting edge would work just as well. There is little point
having a longer cutting edge unless you are looking to cut your material
in one pass. The flute area is weaker than the main shaft so a longer
flute just weakens the cutter in my opinion. In fact since I do not cut more than 1/8th per pass any flute longer than 1/4" is a waste.
Cheers
Peter
This week I continue on with last weeks project of cutting model train parts for my brothers Christmas display train. Just under 1 sheet of Plywood to finish it off and i am looking forward to completing the project.
I will also how how I made the files that allowed me to machine a piece of stock longer than my Table top by rotating the stock 180 degrees.
Where did I get the cutters for this project?
The cutter I used were purchased from this supplier on Ebay
http://ebay.to/2xienoR
Other ebay suppliers of 1/8" down cutting bits.
http://ebay.to/2zfwxYY
They are 1/8" in diameter single flute down cutting spiral bits.
The
length of the cutting edger is 10mm ( 3/8") but anything similar eg
12mm(1/2") cutting edge would work just as well. There is little point
having a longer cutting edge unless you are looking to cut your material
in one pass. The flute area is weaker than the main shaft so a longer
flute just weakens the cutter in my opinion. In fact since I do not cut
more than 1/8th per pass any flute longer than 1/4" is a waste.
How much Plywood
So how much 1/2" plywood was used to make this project?
How easy did it go together?
It went together a dream. I really thought I was going to have to fight it and round all the corners on my parts to make them fit. Much to my surprise it didn't require it. It makes me feel happier about attempting another project in the future.
More photos of the train
How big was the train?
66" long (5' 6")
11" wide
25" high
Not sure there is much more to be said except thanks for watching and I'll see you next time.
Cheers
Peter
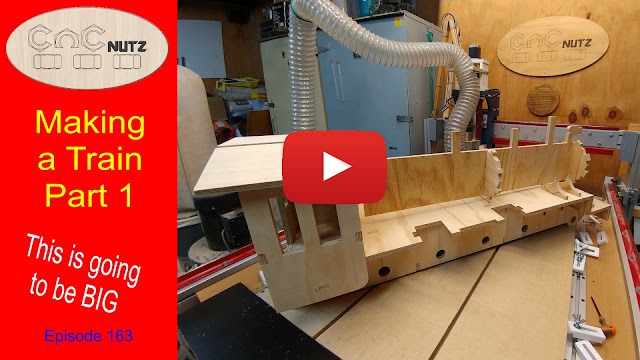
At the start of this year my brother came to me with a thought that a train would make a good addition to the Christmas display he has on his front lawn. With Christmas fast approaching he hunted out a model that we could cut on the CNC and this episode is the start of the train build process. This train is going to be large when it is finally complete and if all goes well it will be motorised so that it can run on a track. The first step in a project like this is to get the train itself built so in this episode we start cutting out the model and get parts of it assembled.
Scaling the model (Box Method)
Scaling the model is a necessary part of making this model and i like to make things as simple as possible. That means not having to hunt around for a calculator to work out how much to upscale the model by. To make things easy I developed the Box Method of scaling which in my opinion the easiest way of scaling a drawing accurately snce you don't need to calculate anything.
There are just 3 simple rules to the scaling method.
- The box must be larger that the item being scaled.
- The box must enclose the entire item being scaled
- One side of the boxes dimension must bear a direct relationship to the measurement being scaled. eg for a 3.4mm item I wanted to scale to 5mm I would make one side of the box 3.4 metres long.
Select the new box and everything inside it.
Scale the dimensioned side of the box to the new dimension eg. If I wanted my 3.4mm piece to become 5mm the I would scale my 3.4 metre to 5 metres and the drawing will be automatically scaled to the correct size all without having to work out the scale factor.
Give it a try and see what you think.
In the next episode I will be showing how I layout the parts for cutting and how to use the 180 degree method to cut the remaining parts on the end of the stock.
Untill next time thanks fortaking the time to watch and read.
Cheers
Peter
Where did I get the cutters for this project?
The cutter I used were purchased from this supplier on Ebay
http://ebay.to/2xienoR
Other ebay suppliers of 1/8" down cutting bits.
http://ebay.to/2zfwxYY
They are 1/8" in diameter single flute down cutting spiral bits.
The
length of the cutting edger is 10mm ( 3/8") but anything similar eg
12mm(1/2") or 6mm(1/4") cutting edge would work just as well. There is little point
having a longer cutting edge unless you are looking to cut your material
in one pass. The flute area is weaker than the main shaft so a longer
flute just weakens the cutter in my opinion. In fact since I do not cut
more than 1/8th per pass any flute longer than 1/4" is a waste.
Model used in this project
www.makecnc.com/steam-locomotive.php
website:
www.makecnc.com