Tuesday 3 December 2019

Making a 3D map of New Zealand - Episode 242

This Episode follows on from my previous map carving video.
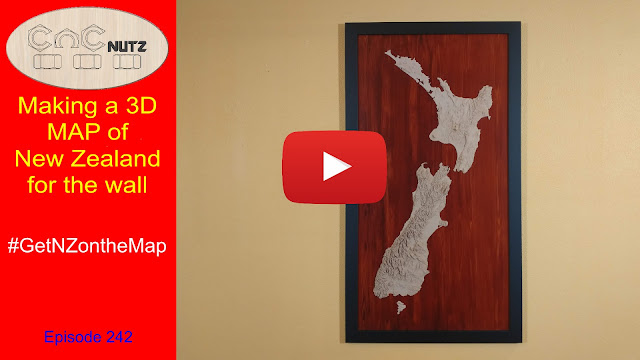
This time I'm going big with a full map of New Zealand in 3D to hang on the wall.
As with quite a few of my projects I changed my mind part way through the build to adapt to unforeseen happenings as well as a much better suggestion to frame it properly.


My original plan was to created a wall hanging as shown on the left but the problem was that the differentiation between the land and the sea is not well defined on a height map so to make it more obvious I ran around the land with a 30 degree Vbit cutter to mark a line and show where the land ended and the sea began.  I didn't realize at the time that the MDF model had bowed up just enough in one spot to allow the Vbit to cut all the way through. Not a problem I thought, I will cut the land masses free and then make a cutout shape as shown in blue. I can then glue the land back in place creating a definite distinction between the land and sea. The more I looked at this the less I liked it until Mrs CNCnutz suggested that I put it on a rectangular board and frame it. Painting the board blue wasn't an option for something this big but could I make a wood grain pattern on a piece of MDF as large as this project? I have never done anything this big before, not even close and that was many years ago.


Well the obvious answer is Yes I can and did and the video below will show you how.


Click to watch


Free software to convert a Grayscale height map to an STL.

The program is called    heightmap2stl-gui

 https://github.com/jeremysimmons/heightmap2stl-gui/releases/tag/v1.3.4

This software can be used for any Grayscale model and once you have converted it you can import the model into your favorite 3D CAM software such as VCarve Pro.

Just down load he zip file heightmap2stl-gui.zip and put the 2 files inside into their own folder. The program does not need to be installed but runs direct from the files as a standalone program. I just put it no my desktop and ran it from there.

There did seem to be a size limit to the model that could be imported so if you find your image is too big just reduce it's size using photo editing software but don't mess with the image color. The actual height won't change as changing size doesn't change the Grayscale of the image itself.


Wood Graining 

Wood graining tools are very simple and the chances are that you have seen them before and wondered what they were . Here are some sources of wood graining tools and don't forget to check out your local hardware store as well.

Ebay
https://ebay.to/2RcYTzk

Amazon
https://amzn.to/2qhuchg

Aliexpress
http://bit.ly/2YcL0CN


The sealing coat on the MDF was Orange Shellac flakes dissolved in denatured Alcohol.
This both seals the MDF and provides the yellow background colour. 
The stain was Resene Colourwood water based stain and the colour I used is Dark Rimu.

The sealing coat for the finished board was an acrylic vanish though I no longer know the actual brand. 

As a personal side note, when applying a clear coat to any 3D project it is best to use a matt finishes rather than gloss. Matt is more forgiving of brush marks and gloss can make viewing the model a lot harder.

Tapered Ball Nose Cutters

Here is the supplier of the tapered ball nose I used in this project.
I used the R1.0xD6x30.5x75L

Just be aware that the tip measurement is a radius not a diameter. So R1.0 is a 2mm diameter cutter. 

http://bit.ly/361mk2O


That is all for this project. I hope you enjoyed it and will join me next time.

Cheers
Peter

Sunday 22 September 2019

How to Make a 3D model of your Home Town - Episode 240

I don't know about you but sometimes I start making one thing and end up making something completely different. Maybe I have a short attention span or I'm attracted to bright shiny objects, but whatever it is it makes life interesting. I started out wanting to make a model of New Zealand but ended up making a model of my home town instead. To be honest I think in this case it turned out to be a much better project than the NZ model would have been as I have now learnt things about my home town that I didn't know before. It makes me want to make more models of places just to see what I can learn about them.

Click to watch


The Secret Sauce
The key to this project is the website https://terrain.party
This will let you create a model of your home with up to 60km square. It will give you a series of Height maps that you can use to make your model. I looked at the range of maps it gave me and the ASTER 30m maps seemed to be the most up to date with good detail. You can look at each and make your pick of which you think is best. I really didn't see any improvement bu using a smaller area so I would personally get the 60km map and cut it down manually by using the vector boundary method I show in the video.

Machining Strategy
When it comes to the final cut 10% step over in MDF is plenty given that MDF is not known for it's quality detail capture. The problem comes when you need to decide the depth of cut for the roughing pass. It's all about compromise. If you go overboard with the depth of cut it can take two or three times the amount of time to do the rough cut as it does to do the final cut. As far as the final cut goes I mention an issue with the way small layers of MDF can fall off but having cut the model with both a 2mm and 4mm depth of cut I'm not really see a quality difference in the final part. I think hat so long as the finishing cutter can handle the remaining material on the board the deeper the depth of cut the better within reason. I wonder if a taper cutter would be able to machine the entire project without a roughing cut.If you have any experience why not leave a comment here or on the video.

Lessons learnt
What I learnt from this project wasn't about machining or 3D model making but about my home town. I've lived here for over 50 years and never realized what it looked like. I've visited the places and seen it from the air or from hill tops but I haven't understood what it really looked like until I made this model. I look forward to making more in the future including my New Zealand model.
I had a look at what I thought would make interesting 3D models like The grand canyon and the Victoria falls but they just don't compare to my own backyard when seen in 3D. I would never have guessed. Many visitors come to the West Coast of the South Island and tell us how beautiful it is here but because I see it everyday I no longer see it. Maybe it's time to wake up and have another look.

Until next time Thanks for watching and if you make a model of your home town I would be interested to see it.

Cheers
Peter

Saturday 31 August 2019

The Completed Console Part3 - Episode 239

Just a few tweaks needed to finish this project off so I thought i would have a little bit of fun with it.
I recently saw a cartoon as I was scrolling through Facebook and thought I could use that as a long drawn out gag for this video because realistically other than adding paint and a few holes there wasn't much else to show.  For those of you not familiar with my channel the voice of the joker is played by Chip who has appeared on a few oh my videos over the last 2 years.
Don't be fooled by his cute appearance. Beneath that fury exterior lies a fiendish sense of humour.


Click to watch


 The Design
So you would be forgiven for thinking the final design lacks a certain amount of  stylishness and i take no offence. I'm not going to argue with you either but in my defence the design has a few requirements that ultimately shaped the final project. Unlike most CNC controllers this needs to be portable. I need to disconnect and move the entire unit quickly and easily. It has to be sturdy and not unbalanced so it won't fall over. The build needs to include some additional features not found on a regular CNC console such as 3 HMDI outputs. One for the touchscreen, one for the wall mounted monitor and a third for video capture. Masso needs to mount externally for ease of  shooting tutorial videos as well. None the less if the back panel was rotated everything on the outside could be mounted inside no problem. 

Files to make your own
If you would like to make your own you can find the files here.

bit.ly/2LCmveS


Changes
The one change I would like to have made was making the ear panel a hinged door for ease of access. I have thought about it but haven't quite  figured out how I could modify it now. Hopefully once it is complete I will not need to touch it again.
  

The Future
Part of the reason for building the new console was practical but the other is that I can now use to go through setting up Masso step by step in the hope of creating a comprehensive reference guide for connecting and configuring a new install.
If you are interested is seeing the process then why not subscribe to the CNCnutz Masso Edition channel  https://www.youtube.com/channel/UCDLVKDi-aTYv7Z7omdaj1jg
That way you will see all the new episodes and even if you don't have Masso you will still learn tips and tricks you can apply on your current build.

The next project.
A friend of mine asked for some help with a project he wanted to do and it got me thinking. I would like to do something similar but on a larger scale if I could. While I'm confident I can draw and machine the project no problem painting it is another matter. Ideally I need an artists help but I will have to wait until it is cut and see where it takes me. 

In the meantime thanks for watching and reading and I will catch you later.
Cheers
Peter 


Sunday 4 August 2019

How I desiign a Project Part 2 - Episode 238

Sometimes you have to think of others when you design a project especially if you are thinking of sharing your plans. A lesson I should know by now but sometimes I forget that taking the easy way out or trying to save material can make a project far more complex than it needs to be. 
I forgot that when I did the initial design of this project and had to return to the drawing board literally . While the outcome is exactly the same the ease with which the new version of the project goes together makes the redesign worth the effort.
While small projects are easy enough to do on the drawing board I like to make these larger projects in small steps. That way I can make and test a part before moving onto the next one. After all that is the way I learnt to do it when I was a youngster and I don't see the need to change now. Especially for projects like this where they need to fit other parts such as the monitor. Something you think will look good on the screen may not be right when you see it built.

Click to watch

The files
If  you would like the files I have used to make the console build so far are available here.
Please be aware that the build is not yet complete and changes may still be made. 
While I mention that there is room in the rear of the console to mount Masso the area is not big enough to mount your stepper motor drive system, VFD, and multiple power supplies.
It is designed to house Masso and it's power supply. It is envisioned that the other hardware will be housed separately. This is designed to suit my requirements.
Feel free to modify the drawings in any way you like to suit your needs.


bit.ly/2LCmveS

Draw runners
The draw runners I used are 8" (200mm) draw runners as shown below. I bought them locally but you can use whatever you have available in your area though this style of runner is very common and you should have no problem locating some in your area.
 

Lessons
If you take nothing else away from this episode remember the screw hole with rear countersink trick. My Father taught it to me and I pass it on to you. If you drill the right size hole and countersink the rear your joints will always pull up tight.

And if you don't think that using a corner stick to join 2 boards together is very good or will not last think again. The table that I now sit at while typing this blog entry is made using this type of joinery and I made several of them 30 years ago. They are just MDF with corner sticks to join them together but they look like they were made yesterday


Thank you for your patience. It took longer to get this far than I thought but a redesign half way through doesn't really help. Even though I don't think it needs it I will be gluing some of the parts in place before I paint it. What colour will it be? You will need to wait for the next part. I couldn't tell you even it I wanted too because I really don't know as I write this.

Until next time.
Cheers
Peter

Wednesday 26 June 2019

How I Design a Project - episode 237

Have you ever wondered how I design a project? 
No?
Oh well, your about to find out anyway. This video is the first part of a series on designing a project from the beginning. Unfortunately as you probably know this sometimes isn't the most glamorous part of the process and to be blunt can be a bit boring. Even worse is having someone trying to pass on their thoughts and plans. At theses times it is best to just nod and smile a lot but this part of the process is important. If someone came up to you and asked you to make them a box then like me I'm sure you would spend the next 5 minutes or more getting as much information about the box as you could. Height, width, depth, material, hinges,handles, finish, etc 
The same applies to a project like mine. I have the advantage that I can see in my minds eye what I want and even though my design is being done on the fly I can see the overall finished product. Some Youtubers will present a 3D model of the finished project before they even start on it which is great from a building point of view but I'm also sure that they run into problems as they build it and need to change things as they go.
It would take me longer to draw a 3D model of the project than to build it so i just get on with it.
Look at it this way.
If it works it is because you planed it well.
If it fails then it is a prototype to sort out the issues before you build the final one.
Either way the main thing is you are making something. 

Click to watch


Final Thoughts
Is it the most elegant way? Probably not.
Does it work. Sure does.
It's no major problem to design a small project on the computer and sometimes it is necessary but for larger projects I find this method works best for me.

In the next episode I will begin cutting and putting the case together.

Until next time
Cheers
Peter


CNC Console Build Files are available at the link below

http://bit.ly/2LCmveS


Don't forget to check out my new Channel. There will be a whole series on installing Masso onto my machine and I will be showing the process. This is pretty generic and can be applied to any installation.

CNCnutz Masso Edition


https://www.youtube.com/channel/UCDLVKDi-aTYv7Z7omdaj1jg


Monday 20 May 2019

How to Update you Vectric Software - Episode 236

 If you own Vectric software and haven't be install the updates you could be missing out.

I've been putting off doing this update for a few weeks now with thought it would make a good Video. Quite often people will ask me for assistance with doing something on VCarve or Aspire and when I ask what version they are using i find that it is Version 6.0 or Version 8.0 when there is no reason that they shouldn't be running Version 6.5 or 8.5
The X.5 versions are a free update to your software which unlike the minor changes within a release which focus on bug fixes the X.5 version add additional functionality. It's like an upgrade only better!  
It's free!!! 
Why wouldn't you want to install it and take advantage of new features.
On average every year that I have used VCarve Pro an X.5 version has been released and it has been free. That means the version you have will be current for 2 years before a new major release comes out. Now I can't promise that it will remain that way in the future but that is the current pattern over the last 11 years.

Some people may be scared of updating but as the  video shows it is childs play to do and only takes a few minutes of your time before you are updated and running again.


Click to watch


Customer Service
 You can tell a lot about acomplany by how it treats it's older customers. As you can see from their update page they still provide the update files from 2009 and from my portal I can still download the software I purchased 13 years ago. Contrast this with companies that give you a few days to download the software and after that it's just too bad. You should have made a backup and we all know how well that works don't we.

Upgrading
Updating is a different thing to ugrading and it cost to jump to the next version. you can tell and update from an upgrave because an update will have the same first digit as you current version eg 8.0 to 8.5 is an update which is free while 8.5 and 9.0 is an upgrade and will cos

Interesting info
While researching the update / upgrade I came across this page on the Vectric website which has some FAQ's about the subject and it is well worth looking at it. I learnt a few thing I didn't know and if you have been thinking about buying Vectric software then this may help with your decision. Remember that you can use the trial software to see if you like it.

https://www.vectric.com/support/switching-to-vectric

Is this a paid advertisment?
Let me start by saying that Vectric did upgrade my version of VCarve Pro last year to Aspire free of charge but they have not asked me to make this video or promote their software. They simply asked that I kept doing what I was doing which is promoting the CNC hobby.
I am making this video because I use the software and like it. There is no other reason and I leave it up to you decide. 


Until next time
Cheers
Peter

Sunday 12 May 2019

How to Name your X & Y is - episode 235

Once you understand how it works naming your axis is simple but those of use that know sometimes forget that is isn't obvious to those who are new to this hobby. It probably wasn't obvious to you when you first started out. If you built from plans or bought a ready to go machine it was all set up for you and you didn't need to think about it. If not you soon have to confront this question. My first build was from a photo I saw and the machine had no gantry to get in the way and was by no means obvious at all. 
Some people think axis length has something to do with it but that is wrong. The confusing thing is you and I can say that different axis are the X and both be right but there is only one correct way to name your axis.
It all depends where you stand!


Getting it wrong
Getting X & Y axis mixed up will make your project cut at 90 degrees to what you see on the screen of your controller and your Cad / Cam software. Not a major issue if you want to live with it and simply by stepping to the side it will all lok right. Not quite so forgiving is mixing up the +ve & -ve directions of the axis. Getting these wrong will see your project come out mirrored in one or both directions depending whether you have one or both axis wrong. Only a few projects will stand up to this type of error. If you remember that X0,Y0 is in the bottom left and X max, Y max is in the top right then you can't go wrong.

It's so simple but so important to get right and not if things don't look right to you on your machine you now know why.

Until next time.

Cheers
Peter

Sunday 21 April 2019

How to make a Lithophane - episode 234

I've been planning to show how I make Lithophanes for a few years now but somehow never managed to get around to it. It is also a good opetunity to try out the Masso CNC controller i have had for a coupe of months now. I've been learning how to use it while it has been set up in my office but you are limited as to what you can learn without connecting it to a machine and actually use it. Theory only gets you so far. As it turns out I am very pleased with how it works and will be using it in future projects but don't worry, I will continue to use UCCNC and Mach3 as well.
Getting back to Lithophanes I think they are one of the most impressive projects you can make with minimal effort. It requires no real skill to create other than good judgement on what subject makes a good lithophane. Choice of the right material to cut the lithophane from is also important for my project as I will explain below.


Click to Watch 


Material
I used Cast Acrylic and below is the label that came on the sheet for those who are interested. If you cannot find this particular product and have a choice of various white acrylic / perspex to chhose from then choose the one you cannot see whtough when you hold it up to the light. If the acrylic is translucent then it won't work. You are relying on the light stopping properties to give you black and when you get it thin enough you will be able to see light through it. I'm also told that Corrian is very good for Lithophanes though I have not see Corrian myself in New Zealand.


Choice of Cutters
Originally I started out with dremmel 2.3mm and 1.4mm cutters but they were delicate, high speed steel and not ideal. This was a time before I had ever heard ot tapered spiral cutters but I had some 30 degree carbide cutters with broken tips. I decided one day to give one ago and see what happened. As it turned out it cut really well so I have used them ever since. the tip is the weakest part so when the very end of the tip breaks off the larger tip that is left is stronger than the original and so long as it isn't too big you won't be able to tell the difference between it and a ball nosed cutter. That's my opinion anyway.

The following Ebay links are Affiliate links


30 Degree Engraving cutters. 
https://ebay.to/2XtV3l5

For those who want to try out tapered Ballnose cutters check out the link below. 
They come in a  range of sizes.
https://ebay.to/2VjX5Xu
 

The EZE-LAP stones I use the most is the red one which is the Fine 600 grit. I use it for Sharpening my Carbide Cutters though the Super Fine one can improve the edge as well. The set ranges from Coarse to Super Fine though if you do  a search for EZE LAP you will find other options but the format of this stone makes sharpening cutters the eaisest.

4 pack set of EZE-LAP Diamond stones
https://ebay.to/2GyzqKP


EZE LAP LF Fine 600 grit
https://ebay.to/2Ix5OQq


PhotoVCarve
This was the first Vectric software I purchased and have used it for many projects over the years. While Lithophanes can be done in Aspire, I recognize that many people cannot afford to purchase the software but PhotoVCarve will allow you get started with lithophanes. If you want to have ago try downloading the free trial version and follow along with the Tutorial they provide. I'm not 100% sure but I think you can carve the provided sample.

https://www.vectric.com/products/photovcarve


LithoPhane Keyring Drawings
Available in Aspire, VCarve and DXF format for those who want to make their own. Remembat that the lithophane needs to be 30mmx 40mm to fit properly.

http://bit.ly/2VV10Hj


Well that about wraps it up for this week
Until next time

Cheers
Peter

Tuesday 16 April 2019

Mouding Toolpaths the easy way to do 3D - episide 232

The other day my mate Russ asked how to make a lid for a box he was building that was curved on top. Since he is using Aspire it would be a simple matter of modeling the lid as a 3d item and cut it out but what if he was using VCarve Pro instead? You can't model in 3d or can you?
Well no you can't, but there is a work around that work for both aspire and VCarve Pro that people forget about. I'm talking about Moulding toolpaths.
Intruduced with the upgrade of version 8.5 software the moulding toolpath allows you to make 3D like cuts withouth having to create a model. It only works with basic shapes but used properly it is very effective. In this case it is quick and simple to do. You just need to understand what you are trying to do.


Click to watch


Are you missing out on a free update?

If you are using Vectric software check out the update page and make sure you are running the lastest version of software that you are entitled too. If you are using version 8 VCarve Pro then you can update it to version 8.517 for free and not only get any software fixes that may be included but also on the case of version 8 you also get moulding toolpaths.

https://www.vectric.com/support/program-updates

If your not sure what tthe difference betqween an update and and upgrade it then have a look here.

http://support.vectric.com/aspire-questions/item/what-is-the-difference-between-updates-and-upgrades 

I'm surprised by the number of people who don't take advantage of the free updates that  are available and so miss out on new features.


Short tutorial videos?

Are people interested in this style of tutorial video?  Let me know.
Quite often I am asked to help people and I have taken to making short personalized videos like this one to show how to do something. I usually don't make a file and sent it in the hope that people go away but would rather show how I did something and have them follow along and do it themself. It's the old saying.
Give a man a fish and he will feed his family for a day. 
Teach a man to fish and he will forever smell funny and probably never go home again.


Video Update

Thanks to you guys for your suggestions on how I could improve my making of the curve and using the moulding toolpath. I have created an update video that covers the improvement.

Click to watch


Until next time
Cheers
Peter


Thursday 7 March 2019

Making a Hobby Horse - episode 230

 Vectric Case study  

https://www.vectric.com/vectric-community/case-study/PeterPassuello


This video follows on from the last weeks Episode 229 where I modelled a 3D horses head from a colouring book picture. Vectric has made a case study of this project and it will feature on their website.
This is a project I have wanted to do for a long time. I made three Hobbyhorse's about 5 years ago and thought that it would be a great video project but since I was using a purchased model I couldn't really do it. 
Enter Vectric and their offer to upgrade my version of VCarve Pro to Aspire. Aspire comes with a 3d model of a horses head that I could probably have used it but there was a problem. It is an realistic model if I want to do  a remake of the God Father but a realistic horses head on a stick isn't really going to suit a children's toy. I'm a big fan of cartoon models for several reasons. The biggest of which is you can get away with virtually anything as a cartoon. Try adding Polka dots to a realistic horse and see how far you get.
I made a few changes to the original design which gave better balance, the ability to easily disassemble it for when you want to transport it out to the country and by using a square stick instead of a round on it cuts down on cost as well. All up I'm pleased with the finished project and if anyone makes one I would love to see finished result. 
Email me a photo to cncnutz65@gmail.com and If you like I can post the photo in the stable on this page. We might get a whole herd of them


Click to watch


Email me a photo of your finished horse and I will Post on this page.
Email your horse to cncnutz65@gmail.com  


 Hobby Horse Stable


Peter Passuello


Hers is the Hobby Horse Gerry Kaslowki made for his Grandson. It came out great. Thanks for sharing with it us.
Gerry Kaslowski


Friday 1 March 2019

Creating my First 3D Model - episode 229

For years I have avoided trying to make 3D models, even very simple ones because no matter how much I tried they just didn't come out right. The only successful model I managed to make was the back of a dinner plate for a project and that took me more time to draw than I like to think about. Fortunately Vectric added modelling toolpaths to VCarve Pro which now allows me to make designs such as a dinner plate and other basic 3D shapes very quickly but the Holy Grail of 3D modelling still alluded me. So a few months ago Vectric contacted me and asked would I be interested in upgrading my VCarve Pro to Aspire. I accepted the offer and finally had decent tools to create 3D models. I watched the tutorial videos and the process looked relatively easy to follow so I gave it a try and would love to say it worked first time but that would be a lie. The second attempt wasn't much better nor was the third but I could see little improvements with each successive try. I went back and watched the tutorials againg and things started to make sense. I needed better 2D Vectors to start with and I also needed stop trying to make it look perfect as I added the various components. The better stratagy for me was to get all the components on the page first and then look at the over all picture and tweak things from there. Adjust each piece as needed and any other piece that is affected by the change until it looks right. I needed to have some sense of proportion and while I may  not be able to see what is right it is obvious when something is wrong. Once the model as looking right the fun really began. The Sculpting was the part of the process I enjoyed the most. I found the sculpting tools easy to use and it was surprising what could be achieved.


 Click to Watch


Result
Even for someone as artistically challenged as myself  I found the modelling tools in Aspire easy to use and with a bit of practise will provide good results. For my project I wanted a cartoon horses head and I'm very pleased with the final result. In the great scheme of things this is a very simple project and I'm a long way from being invited to add a new face to Mount Rushmore but it's a start. There are still plenty of tools in Aspires model making arsenal that I haven't even looked at yet as this was all done with the create shape and sculpting tools.

Conclusion
I have tried many free 3D modelling and a couple of paid ones in the past and haven't managed to make anything worth machining with the exception of the back of a dinner plate. Sure it took me a few tries for things to start falling into place but with a little persistance the results started coming. Now I'm sure that there are little improvements that could be made to the model here and there. I'm also sure that someone with an artistic eye could create a thing of beauty, that would put my model to shame, but for me this is perfect the way it is. 
Please don't think I am saying nice things about Aspire because of the upgrade. I have used Vectric products since 2006 with PhotoVCarve, Cut3D and VCarvePro and I use the software because I like it and I find it easy to use. 

Future
This model is just the start of the project. In the next episode I will be machining the horses head and its true purpose will be revealed.

I would like to thanks Vectric for making this project possible and if anyone would like to visit their website and view their software follow the link below. why not download their trial software and have a play.

www.vectric.com


Until next time
Cheers
Peter

Sunday 10 February 2019

Install XHC-HB04 Pendant on UCCNC - episode 231

Just before Christmas I entered the Dave Gatton Christmas Challenge 2018 and was luck enough to be placed 5th in the competition. The prize was a Mach3 XHC-HB04 Pendant. It is designed to be used with Mach3 but since I made the move to UCCNC last year it was going to be a bit of a worry as to whether I could use it or not. The worry was wasted because a little bit of research revealed that it will work and as it turns out it was childishly easy. This video takes you on a tour of the pendant, showing how to install and setup, not that there is really anything to do in all honesty. I found the defaults were right for me and I just added a few keys fo convenience.


Click to watch video


Below is a close up of the Pendant and the keys.


Key functions
Reset                   Estop machine and reset
Stop                     Stop running Gcode 
Silver Button        On / Off switch
Home                   Home the machine and set Machine coordinates to X0,Y0,Z0
Start / Pause        Start Gcode file and feedhold
Rewind                 reset Gcode file back to the start
Probe -Z               Run Auto Zero routine. If you have a custom one it will run this.
Spindle                 Turn on and off spindle
=1/2                      Divide coordinate by 2 selected by the axis knob
=0                         Set selected axis to 0
Safe -Z                 Raise Z axis to safe height
goto Zero              Move all axis to the origin point    X0,Y0,Z0
Macro -1               User defined function
Macro -2               User defined function
Macro -3               User defined function 
Step ++                 Cycle through step increments 1,10,100,1000
MPG Mode            allow MPG jogging

Selector switch      Select X,Y,Z,A, Spindle speed and Feedrate 

MPG                      Manual Pulse Generator moves the selected axis in a manner                                             dependant on direction of rotation and speed. 

LCD Display          Shows Working and Machine coordinates and other info depending on                                   where the selector switch is positioned.


Mach3

despite the fact that this Pendant is made for Mach3 and is the only controller mentioned in the manual after 2 days I still can't get Mach3 on my machine to recognise it let alone configure it. It could be that i am using Windows XP or maybe I am not using the right plugin. By contrast it took 10 minutes to install on UCCNC without any instructions. Something is not right here. I will continue to try and see if I can get it working even just for interest sake.

Conclusion
This Pendant feels well made and very solid. The USB cable could be a bit of a nuisance but only time will tell. Would benefit from a loop to hang the pendant up but making one from some cable ties will solve the issue. The LCD screen is very handy and it is very easy to use. The MPG is quite intuitive when it comes to turning. I thought I would have trouble remembering which way to turn to move an axis in the direction I wanted but oddly enough the best way to get it right is to not think about it.

Is it better than my old pendant?
I honestly don't know. I have been using it for so long it is sent nature. I like that I can ut it one handed unlike the new one which requires both hands. I will need to use the new one a bit longer before i can make a decision as to which I prefer. The one thing I will say for sure is I would not go out and buy the HB04 to replace the current pendant I have. There is nothing I can do on the new one that I can't do on the old with the exception of see my coordinates but to be honest I never look at them anyway when using a pendant.

Update!
In the video I show that you need to put a check in the call at startup box. This is incorrect and checking this box will cause the configuration box to open at startup. If you leave it unchecked the pendant will still work and you will not be bothered by the start up box when you start UCCNC.


Until next Time
Cheers
Peter

Monday 21 January 2019

Create Custom Stock for Vectric Software - episode 228

Inspired by the last episode a viewer asked a question. Is is possible to create your own Wood stocks in Vectric software as the the options available don't really match the wood he was using. Not only is it possible but it is easy as well.
The process couldn't be simpler. Just photograph the material you want to use and then drop the photo into the Vectric software directory containing the Stock images.
Depending on the photograph you took you might need to edit it in photo software. This may include color correcting, framing the image to remove anything that you don't want or anything else you might want to do to it. Save the image as a JPG image and you are ready to add it to your vectric software.


Click to watch


Sizing requirements
there doesn't arrear to be any as all images I have uploaded have worked fine.

Which software can you do this on?
From my testing it looks like you can do it on all Vectric software though the option to visit the application folder from within the software was only added recently to VCarve Pro and Aspire. Before this you had to locate the textures folder manually to add the photo's.

In Cut 3D I found my materials Under 
C:\Program files (x86)\Cut3D\Textures\Materials

PhotoVCarve 
C:\Program files (x86)\PhotoVCarve\Textures\
This then offered a list of material folders like wood, metals,Stone and Misc so put your photo into the appropiate folder.
 

Special application
If you were to take a photo of the entire piece of material you were going to machine and orentated it correctly I think you would get an exact replica of the finished item down to the grain. This might be handy if you want to show someone what to expect. Just enter the job dimensions to match the stock size and it should work.
I haven't tried it myself but I see no reason why it won't.

 I hope you found this interesting and will have a go at creating some stock for your version of Vectric software. Very handy for the native woods you ave in your own country.

Until next time.
Cheers
Peter


www.Masso.com.au

Thursday 3 January 2019

DIY Bedside Lamp - episode 227

Sometimes it good to have a small bedside lamp beside your bed that only puts out a little light. I personally don't see the need for a small portable sun when you wake up in the middle of the night and want a light. In fact a bright light is the last thing you want and in my experience it is worse than no light at all. Your eyes clamp shut while your pupils try and adjust. I'm sure an infomercial would have the subject stumble out of bed, tahe a wrong turn and plummet out a third story window.
That's why I decided to look for a small rechargeable LED light that has a warm color and easily adjustible. I hunted around and after eliminating the ones that didn't have batteries, gave out multi colored light like a night club I finally found one that suited my requirements.
I have to say that while it isn't very bright as such it really up a room enough to see and because these days I read from a phone or Tablet I don't really need a bedside reading lamp. 
The only problem with my light is that it is a really light, light. Stretch out your hand and you are just as likely to push it aside as you are to turn it on. It really needs a heavier base and it needs to look a lot less cheap. Adding the wooden base fixes both problems.


Click to Watch


Where did I get the light?
I found it on AliExpress and it is the only light that I could find that matched my requirements. At least the only one that I was confident from the description would do the job. The link below will take you too it but I don't know how long it will be available for.


http://bit.ly/2LNTjyt


So far I've had the light do a month and other than charging it when it arrived I haven't had to charge it since. The battery is meant to last 2.5 hours of contineous use at full brightness and it will be interesting to see when it next needs to be charged.

Want to make one?
For those who want to make one you can download the drawings using the links below.
Drawings are provided in Aspire, VCarve Pro  and DXF formats


http://bit.ly/2LLmpys


I hope you enjoyed this episode and I will see you next time.

Cheers
Peter


www.masso.com.au